
With HubSpot connected, every new booking can create a contact in HubSpot, so leads from your booking page land in your CRM without copying them by hand. The HubSpot integration is in beta and needs the Pro plan.
Connect HubSpot
- Open Settings, then Connections, and select CRM.
- Find HubSpot and click New Connection.
- Sign in to HubSpot, choose the account and click Connect app.
The connection shows as Active. DaySchedule asks for access to contacts, companies and leads only.

Create contacts from bookings
- Open Workflows and click Create Workflow.
- Enter a Name, such as "New bookings to HubSpot", and choose the resources. Turn on Team Automation to include the whole team's bookings.
- Under Trigger, choose Event Scheduled and turn on Run immediately.
- Under the action, select HubSpot and pick your connection.
- Check the Content (see below), click Test run, then Create Workflow.
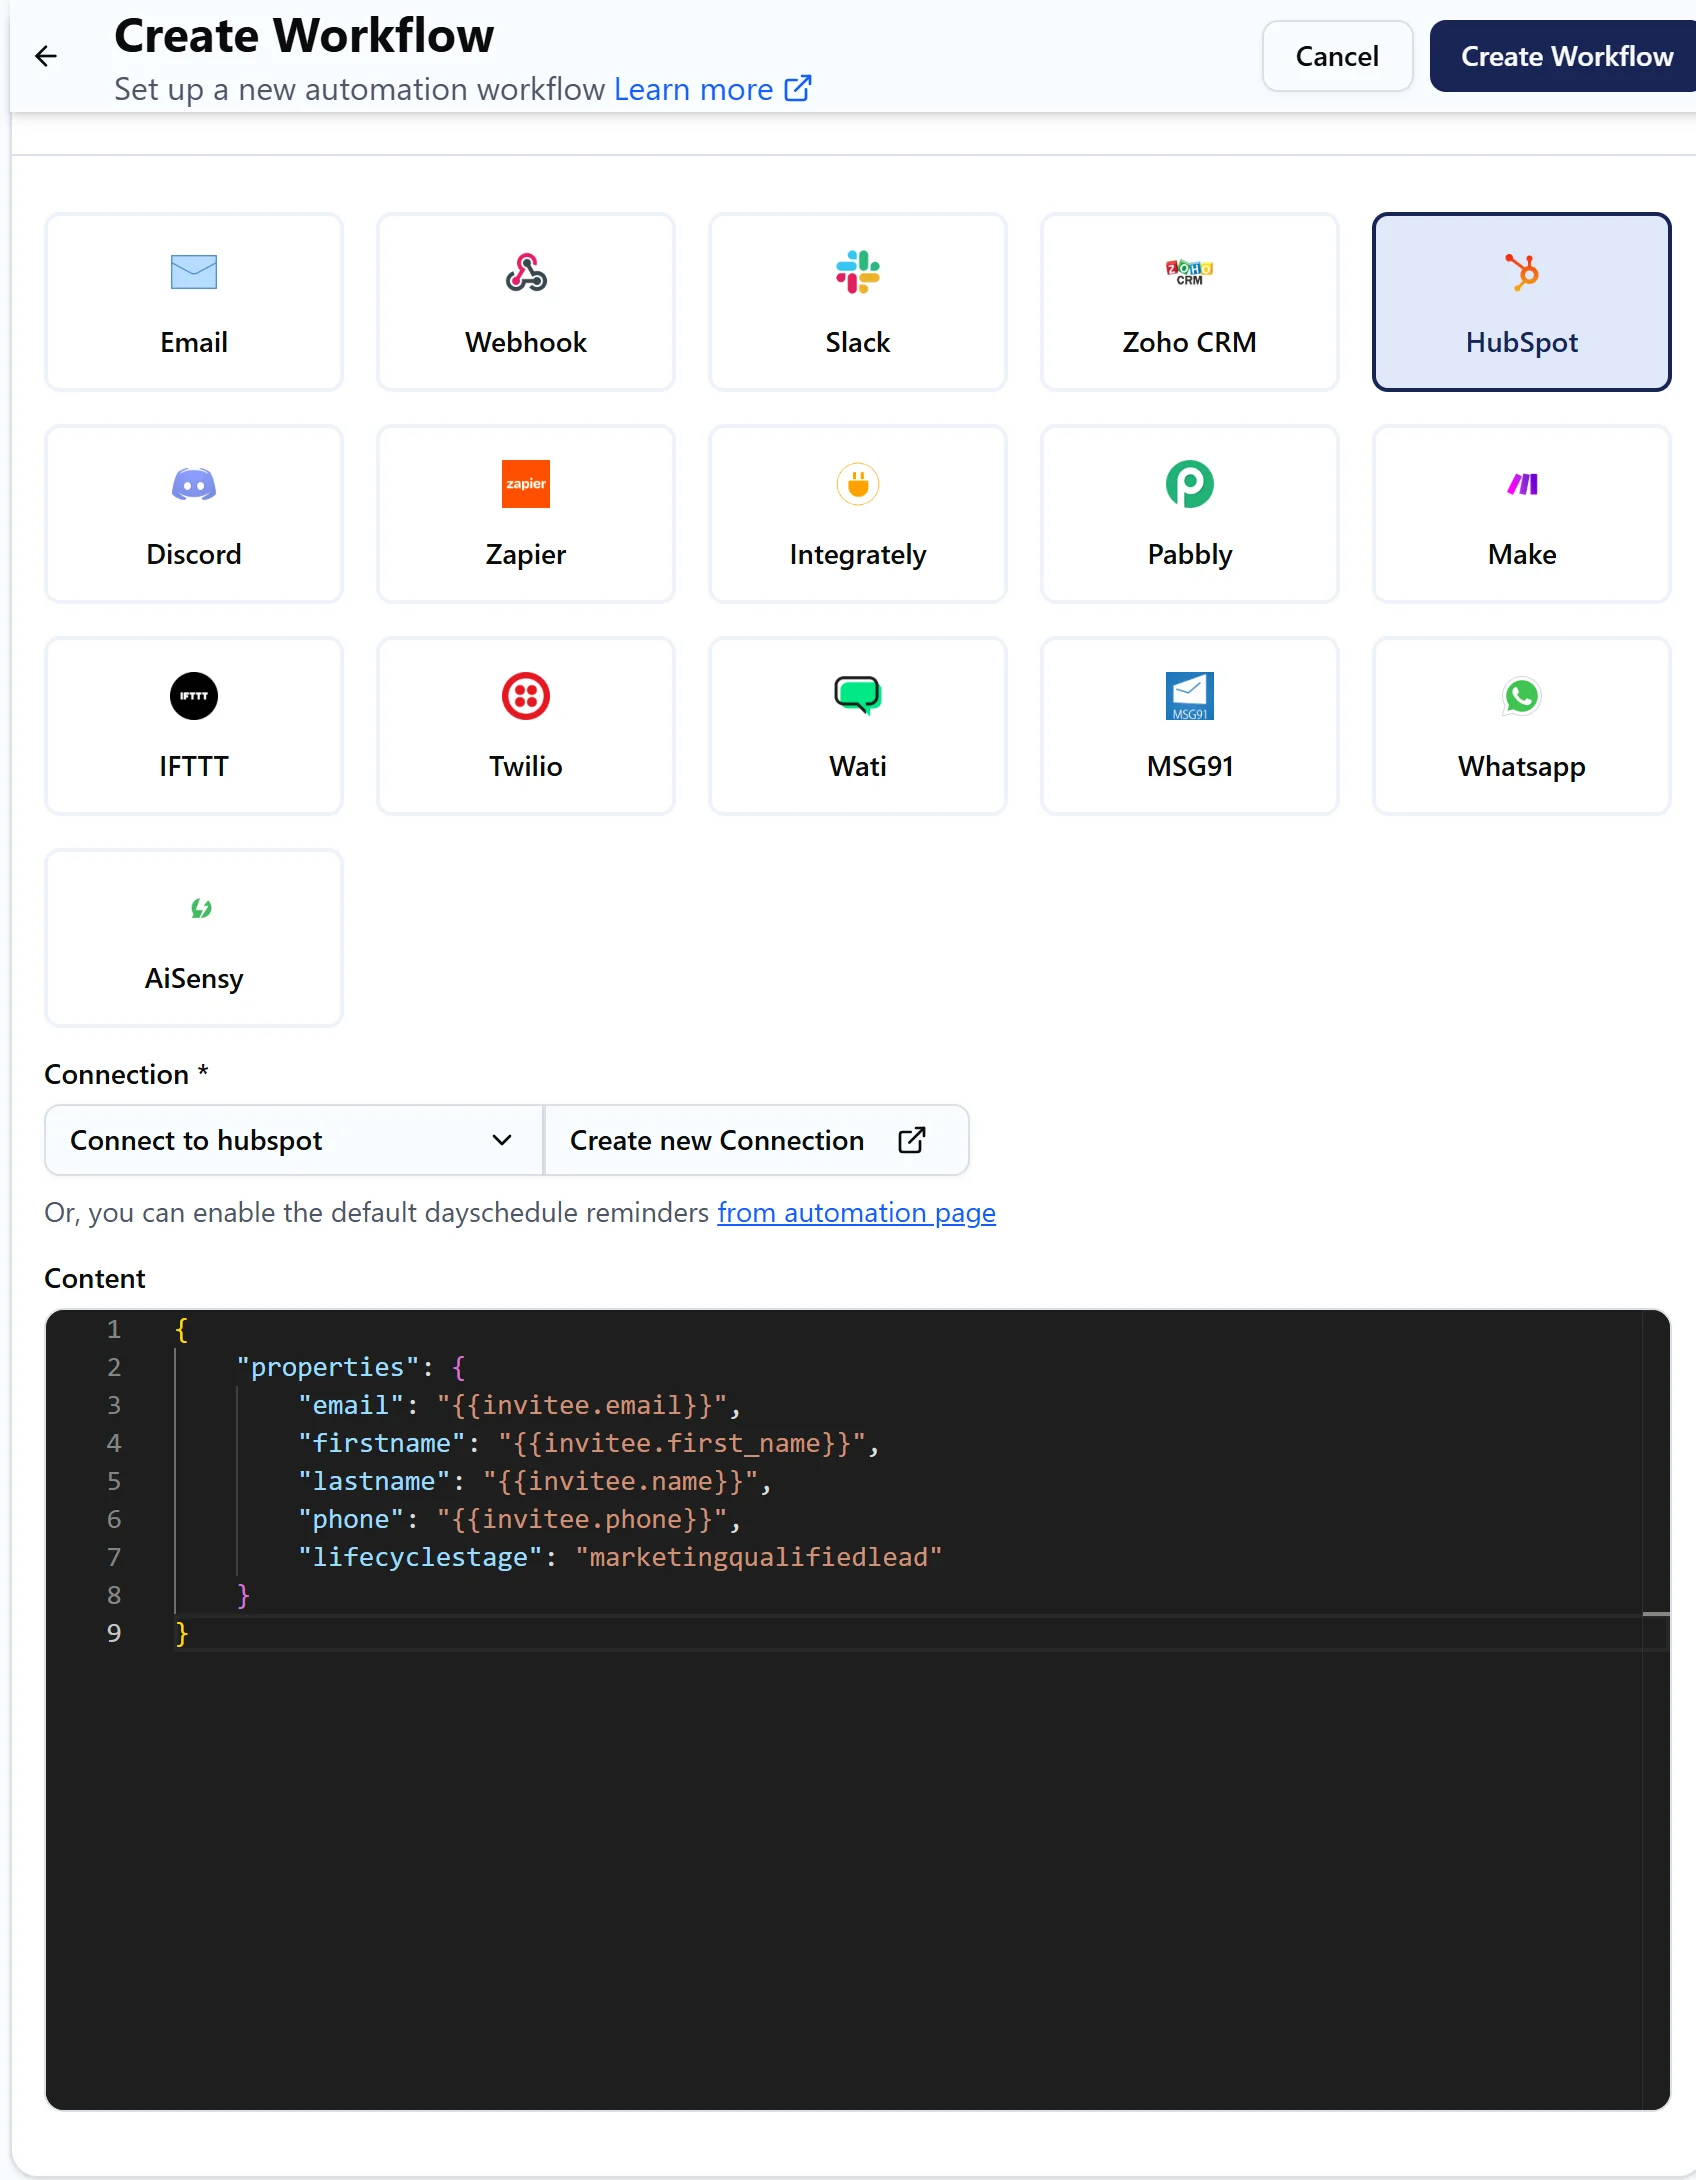
Map fields to HubSpot properties
The Content is the contact you send to HubSpot. Each key is a HubSpot property's internal name, and each value is a DaySchedule variable:
{
  "properties": {
    "email": "{{invitee.email}}",
    "firstname": "{{invitee.first_name}}",
    "lastname": "{{invitee.name}}",
    "phone": "{{invitee.phone}}",
    "lifecyclestage": "marketingqualifiedlead"
  }
}
Change lifecyclestage to the stage you use for new bookings, such as lead or opportunity, or remove the line. To fill a custom property, add its internal name, shown on the property's details in HubSpot's property settings, with a value, for example "booked_event": "{{booking.resource.name}}".
If the phone number isn't arriving, check that your booking form asks for one.
If the contact isn't created
Open Workflows, then Run History, and click the job to read HubSpot's response. The usual causes are a property name that doesn't exist in HubSpot, a value that doesn't match a dropdown property's options, or a contact with that email already existing. If a workflow fails twice in a row, DaySchedule turns it off and emails you, so switch it back on after fixing the error.