
A schedule is a set of working hours in a time zone, such as "Monday to Friday, 9 AM to 5 PM, America/New_York". Events use a schedule to decide which times to offer, and DaySchedule then removes anything already booked or busy on your connected calendar. You can have several schedules, for example normal office hours and a Saturday clinic, and pick a different one for each event.
Create a schedule
- Open Availability and select the My Schedules tab.
- Click Create Schedule.
- Choose the Owner if you manage schedules for your team, enter a Schedule Name and pick the Time zone.
- Set the hours under Weekly Availability (see below) and save.
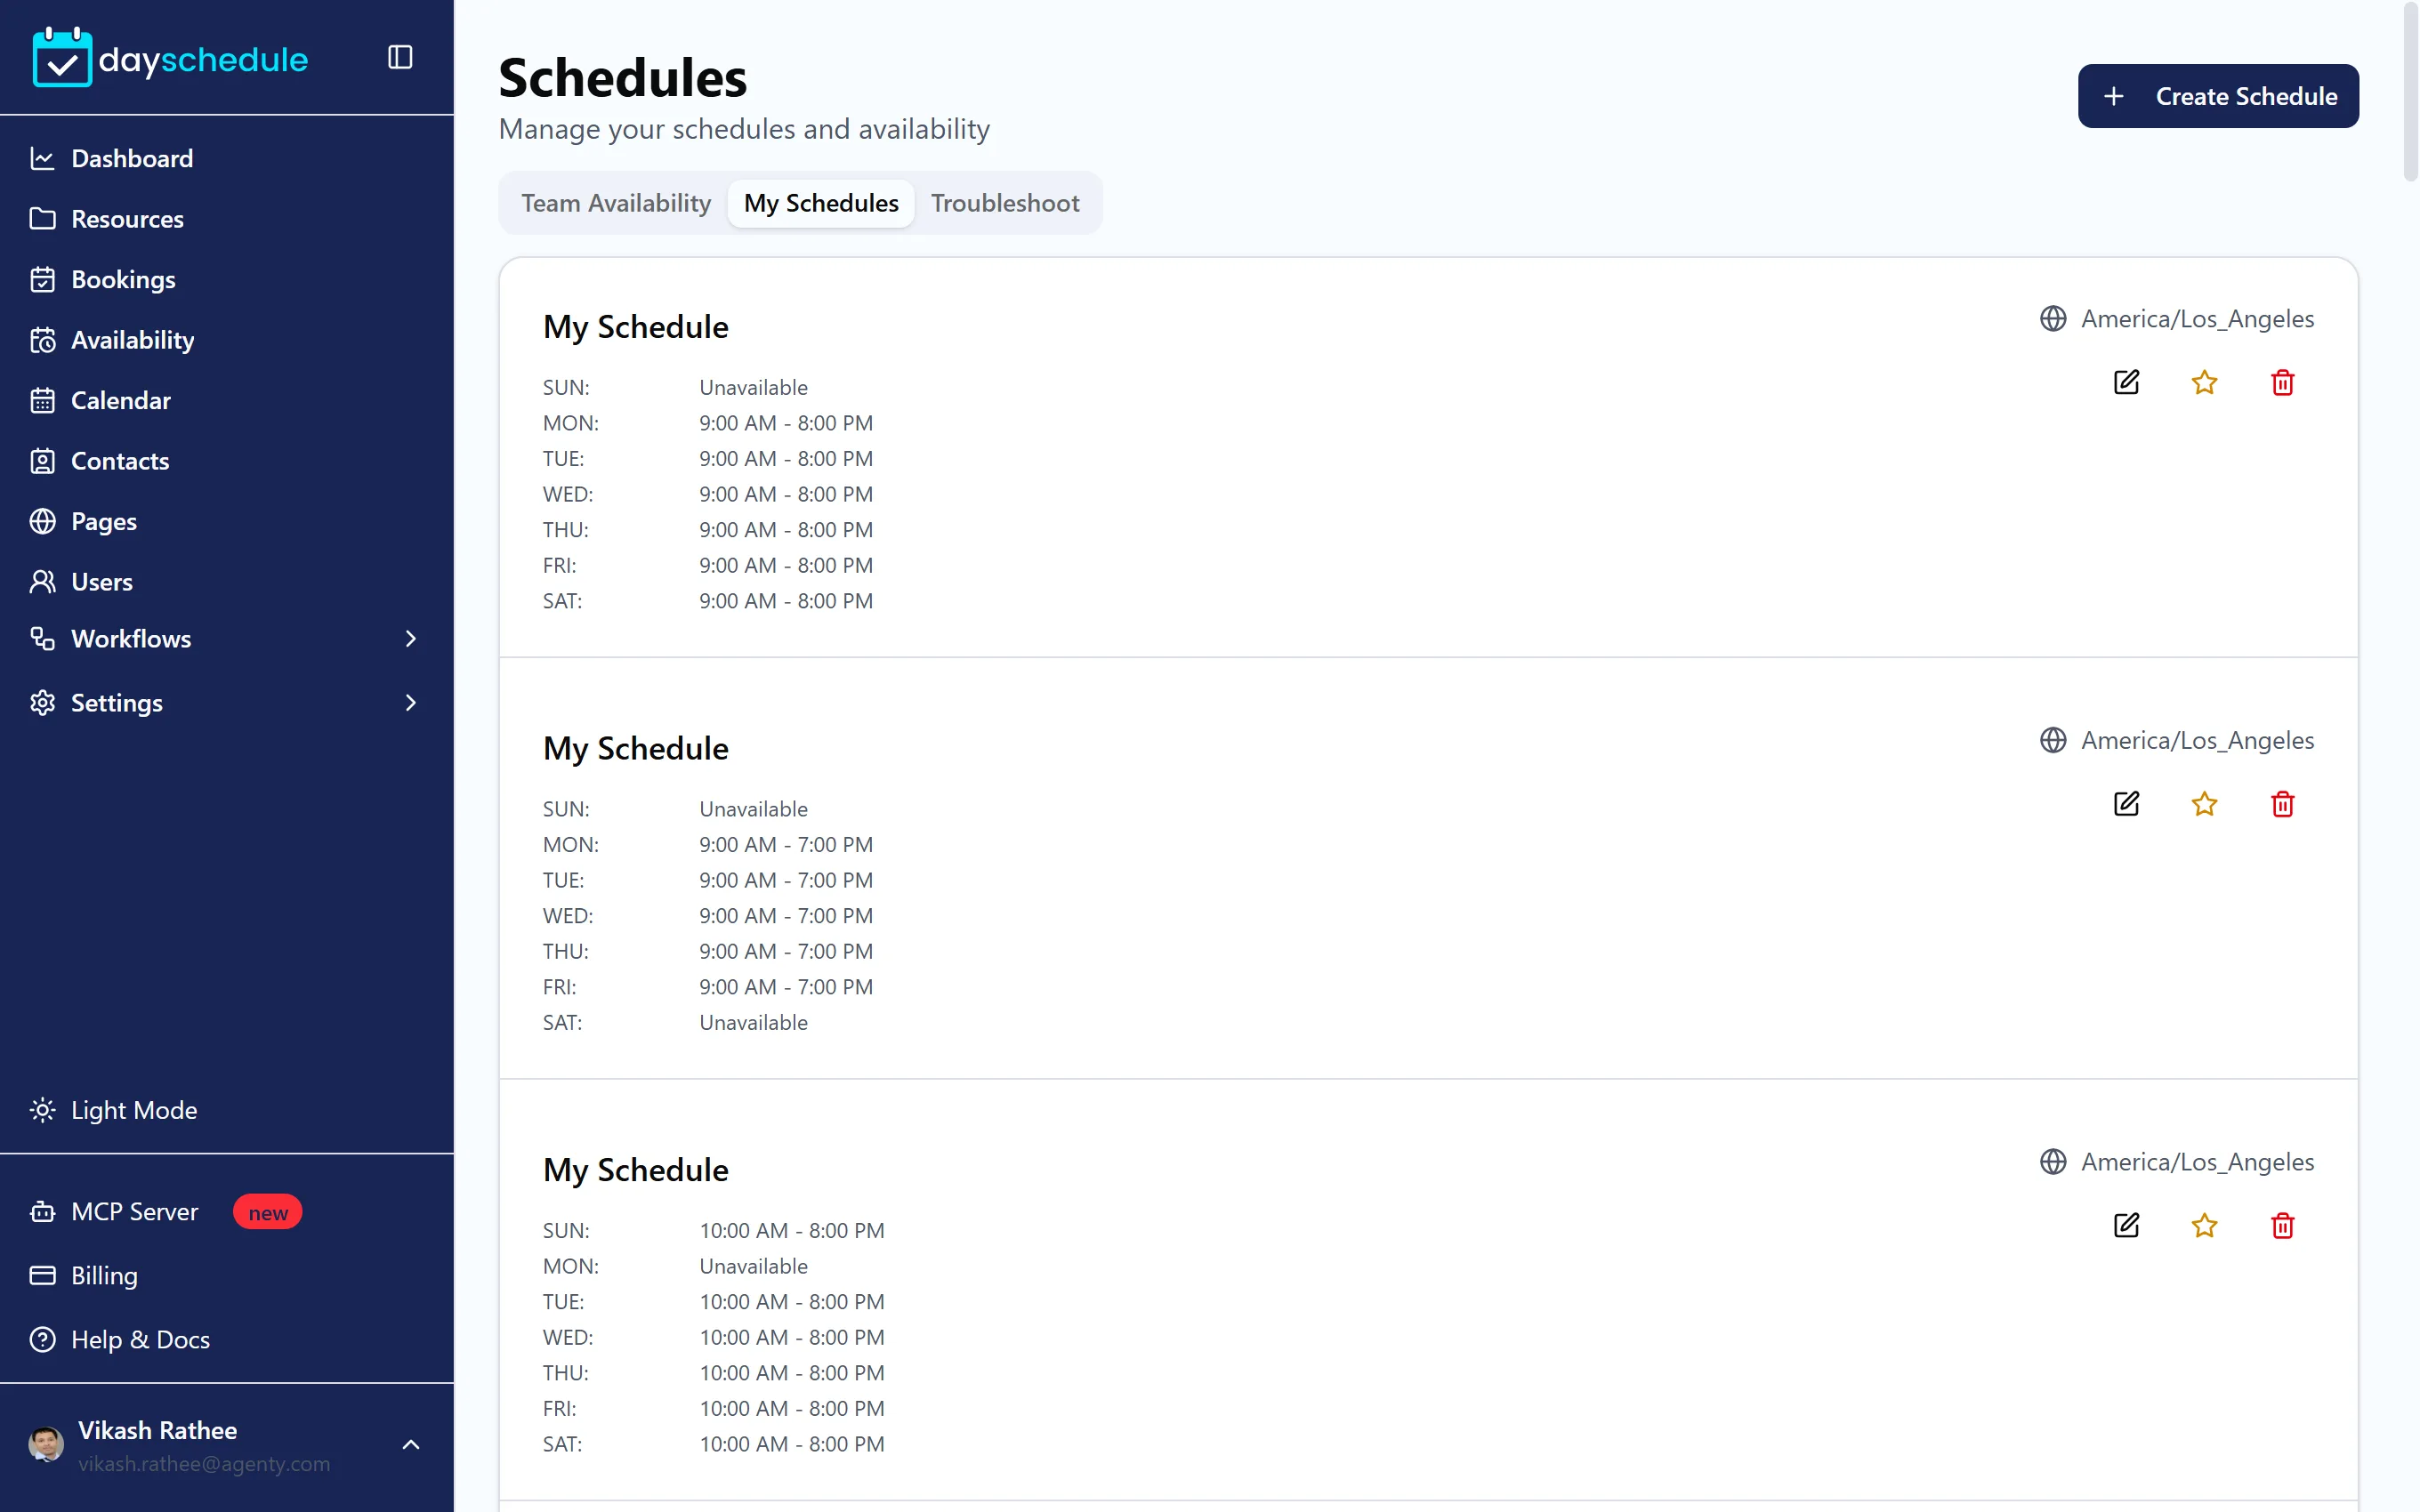
Each row has Edit, Make it default and Delete actions. The default schedule, marked with a star (★), is the one new events use. Round robin events and service menus always use each member's default schedule, so keep it up to date.
Set your weekly hours
Under Weekly Availability, each day has one or more time ranges:
- Turn a day off to make it Unavailable, such as Sunday.
- Enter a start and end time, such as "9:00 AM to 12:00 PM".
- Click Add to add another range on the same day, for example "2:00 PM to 6:00 PM" after a lunch break.
- Click Copy to copy a day's hours to other days.
- Click Delete to remove a range.
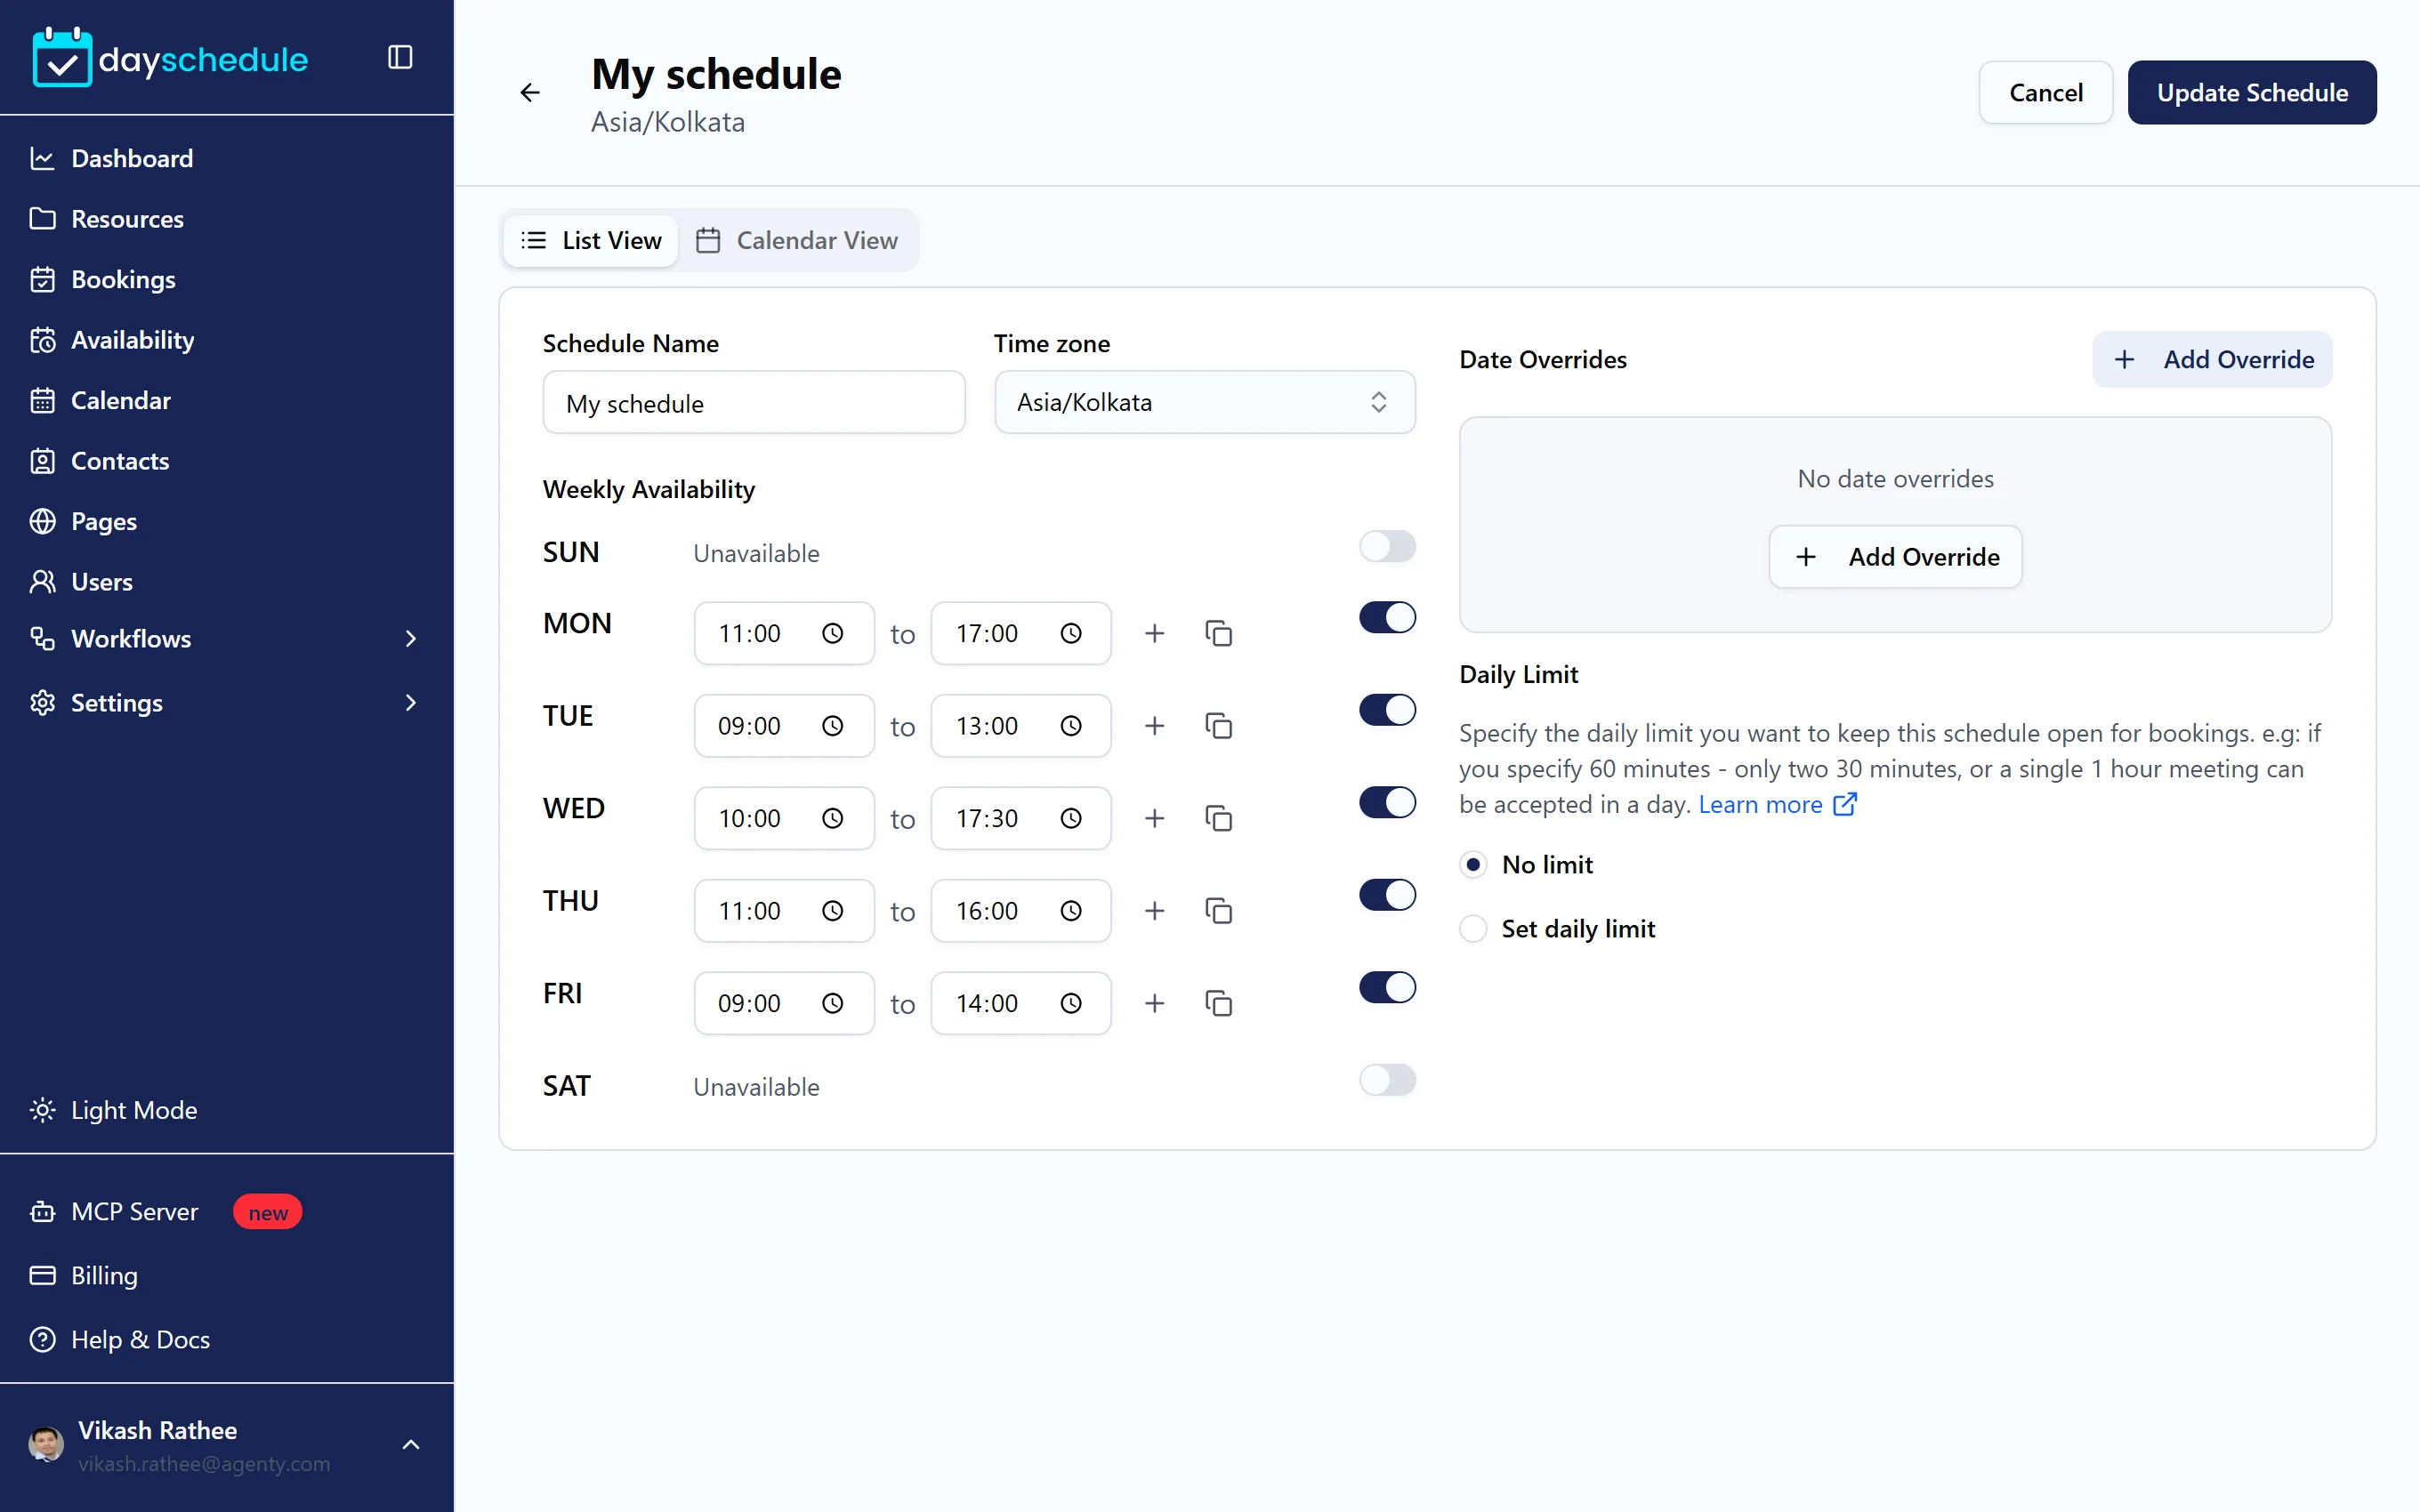
Switch between List View and Calendar View to check the result on a calendar. Each time range also has a spots field that overrides the number of seats for that slot. It applies to group events only. See make a different schedule for each day.
Block holidays and change hours on specific dates
A date override replaces your weekly hours on the dates you pick, without changing the rest of the schedule.
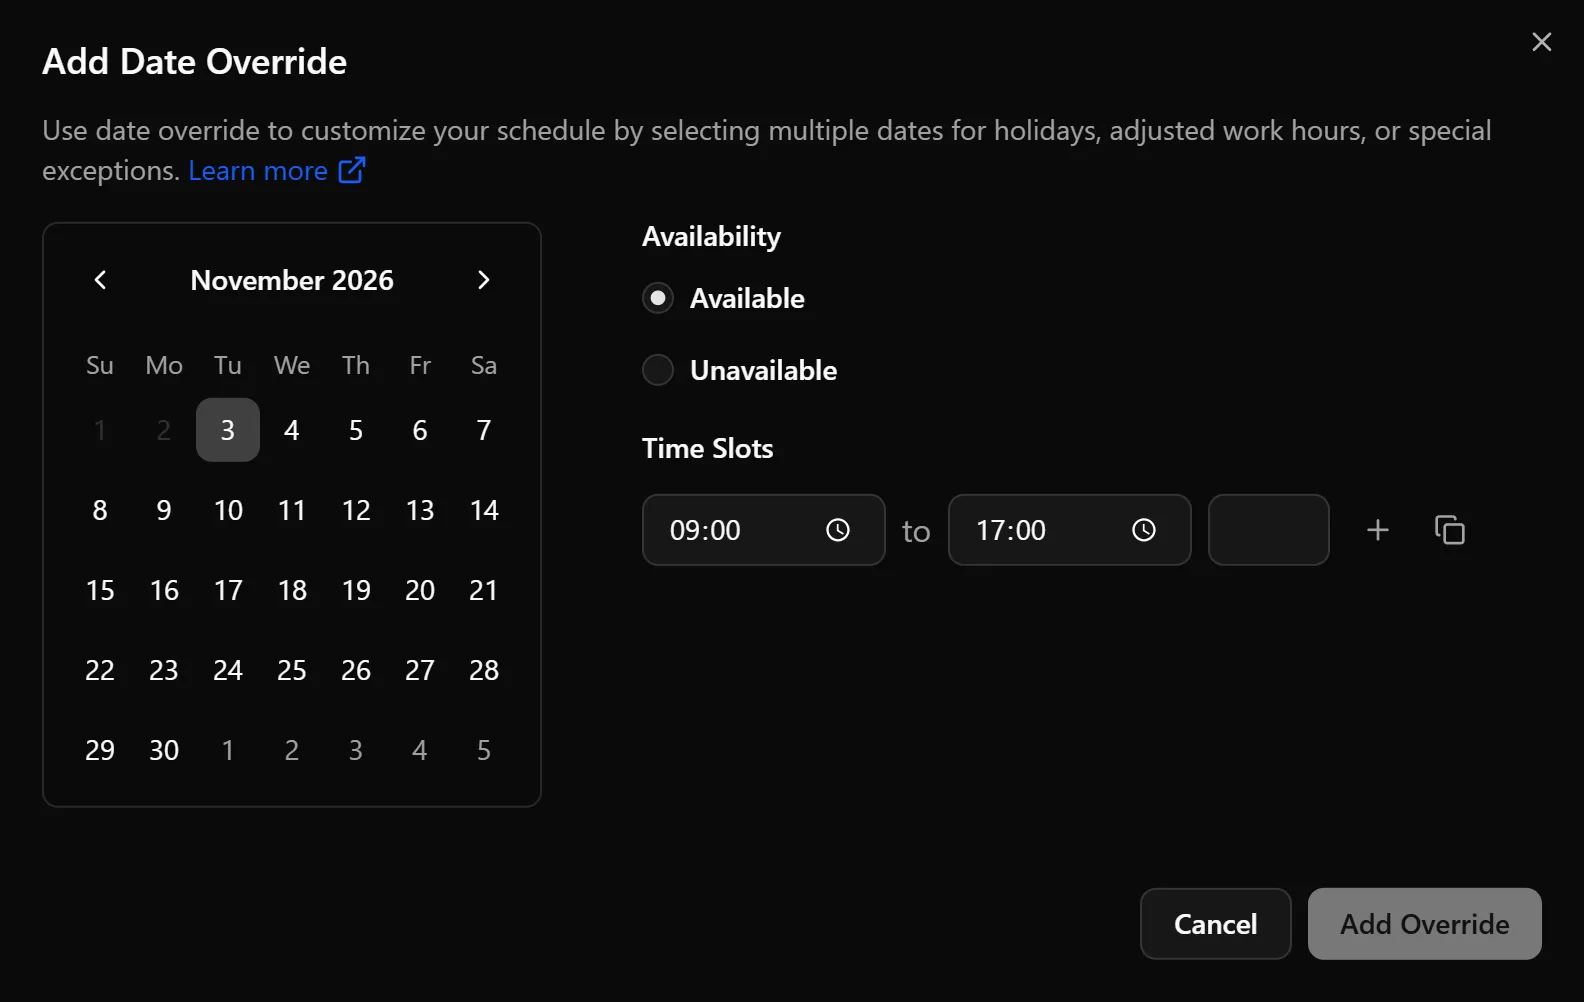
- In the schedule, click Add Override under Date Overrides.
- Select one or more dates on the calendar.
- Choose Unavailable to block the whole day, such as a public holiday or vacation, or Available and enter the Time Slots for that day, such as shorter hours on Christmas Eve.
- Save the override.
Cap the hours booked per day
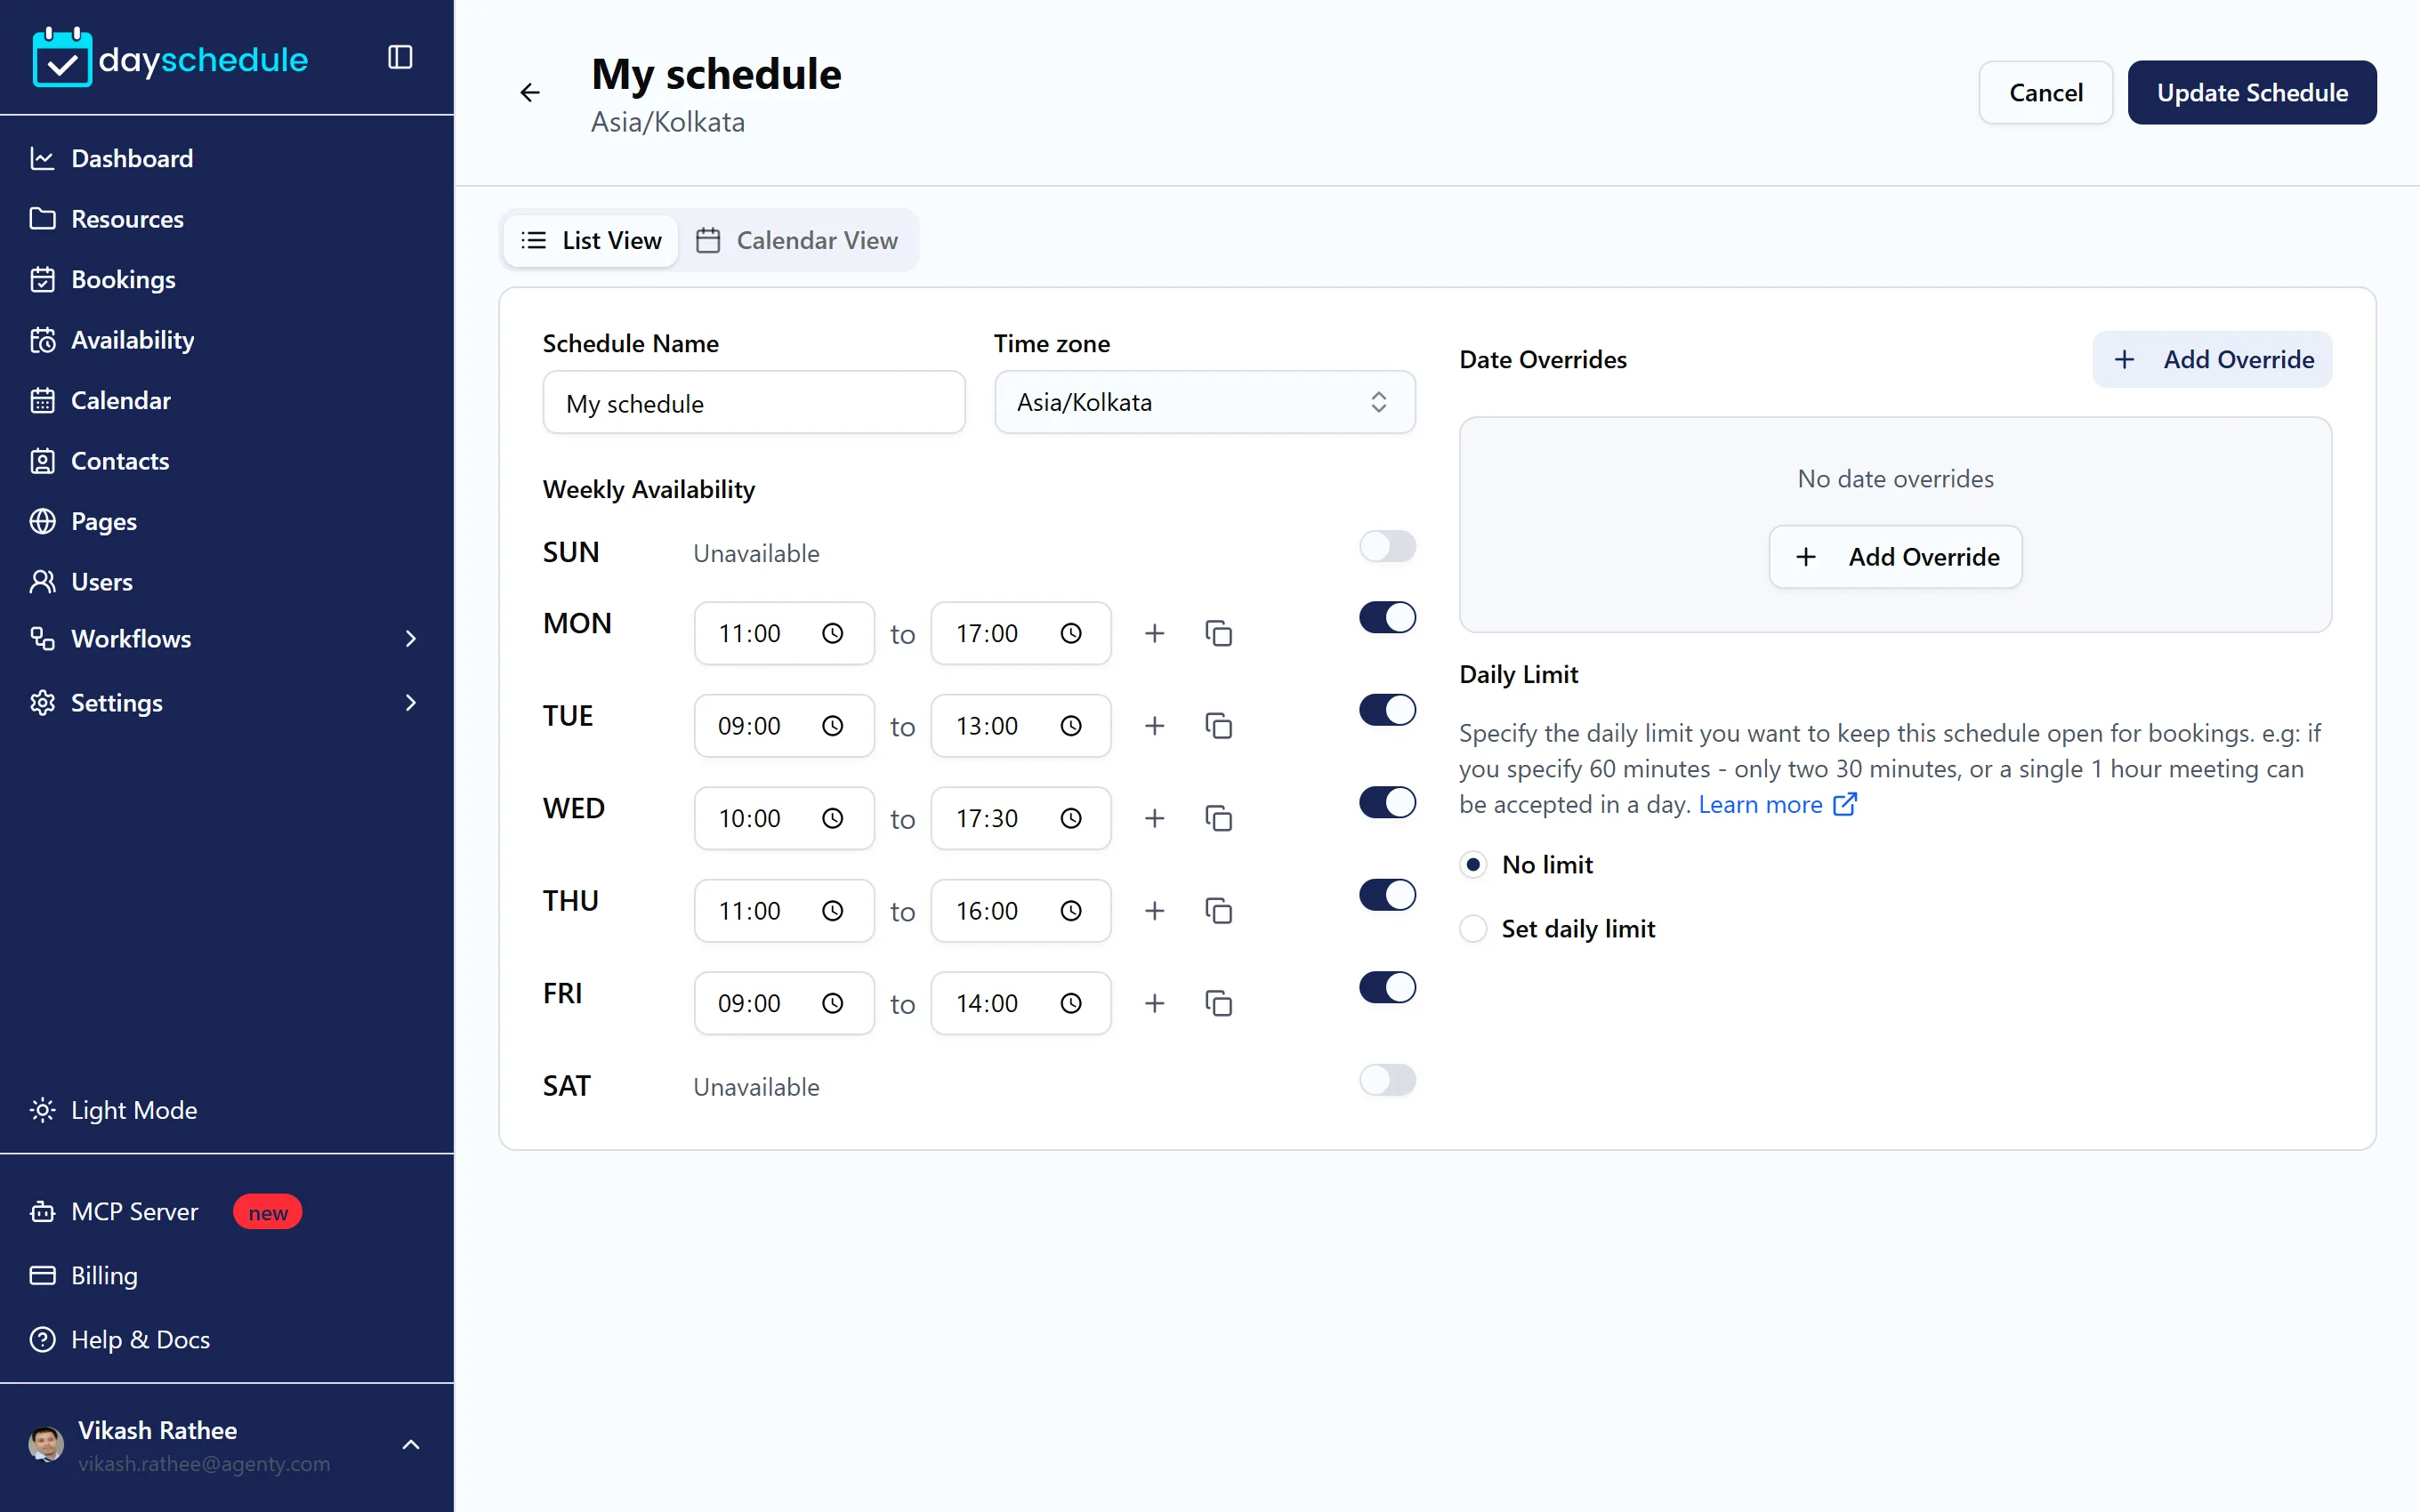
Daily Limit keeps the schedule open only until a number of minutes is booked on a day. Choose Set daily limit and enter the Maximum minutes per day. With 60 minutes, you can take two 30 minute meetings or a single 1 hour meeting a day, across every event that uses this schedule. Choose No limit to turn it off.
To limit the number of bookings for one event instead, use the Limits tab.
Use a schedule in an event
Open the event's Schedule tab and pick the schedule from the list. See Durations, buffers and notice. If times you expect are missing from your booking page, the Troubleshoot tab shows why.
Schedules can also be managed with the Schedules API, or by asking an AI scheduling assistant to update your hours and block dates.